Powered by Blogger.
We are saddened to announce the passing of Gary Bunzer on April 17, 2020. We hope the RV Doctor website will continue to provide helpful information for you. Thank you for your interest and support for the RV Doctor - Debbie, Heather and Gretchen
Showing posts with label Water Heater. Show all posts

Monday, April 3, 2017

No Water Pressure in RV Fresh Plumbing System

The water pressure in our motorhome is getting lower and lower in the bathroom. Plus it makes a whistling sound when the hot water is running. The sound seems to be coming from or near water heater. I have replaced the connector and pressure valve where you hook it to city water. It still has low pressure in the bathroom; especially the hot water has very low pressure. Any help would be appreciated!
Billy, (Paris, TN)

Billy, here’s a couple things to check. Remove the faucet strainer at the outlet of that bathroom faucet set. It simply unscrews from the outlet. There may also be a flow restrictor component inside, depending on the brand of faucet used in your motorhome. A flow diverter may also be present; usually a white plastic piece with holes in it. It basically directs the output flow to a certain pattern. Be sure all the components in the tap outlet are clean and free from all obstructions. It’s common for mineral deposits to accumulate in this strainer assembly. It’s possible that significant flow restriction at the faucet would cause back pressure at the water heater. As an annual procedure, it’s also a good measure to perform this simple maintenance task at every faucet in the RV.

Additionally, some faucet assemblies have removable stems for both the hot and cold faucet valves. In some cases, these can be removed for cleaning. Again, it depends on which brand the manufacturer originally installed.

Your situation could also be caused by an issue originating at the rear of the water heater. Gain access to the rear of the heater from inside the RV. You’ll probably see a set of bypass valves used for winterizing. First check the valves themselves. You will either have a one, two or three valve set-up that allows you to bypass the water heater for winterizing purposes. Be sure the bypass valves are in the correct position and that the appropriate valves are either fully opened or fully closed.

There should also be a check valve at the cold water inlet to the water heater. The cold inlet is the bottommost fitting. The check valve is a one-way backflow preventer that allows cold water in and prevents the heated water from migrating out of the water heater back into the cold piping system. It’s possible the check valve is partially open; again mineral deposits can prevent the spring inside from closing off the valve completely. This is probably the source of the whistling noise you hear. You can obtain a new check valve at your local RV accessory store. It will attach with common pipe threads. Be sure to obtain the correct size. You will have to drain the water heater in order to remove the cold water line plumbed to that check valve fitting. Flush out the water heater as you drain it. There are aftermarket hose attachments available to aid in this process. This will help eliminate those pesky mineral deposits that can migrate to the faucets.

When installing the new check valve, apply a pipe thread sealant approved for fresh water systems to the male threads and carefully thread the new valve into the heater, taking care not to cross-thread it! Then simply re-attach the cold water inlet tubing to the new valve, apply water pressure to refill the heater and check for leaks. You’ll know the water heater is filled when you have free flowing water from each hot faucet in the motorhome. It may take a minute or so of running to rid the system of air, but this should eliminate any blockages and that whistling noise.

##RVT788; ##RVT883

Monday, November 23, 2015

RV Water Heater Stripped Threads On Drain

I have a water heater on my RV that I had to use a impact wrench to undo the drain plug. I read in one of your articles a reference to a thread chaser or tap. Could you please let me know where I can buy this tool. I've checked plumbing outlets, machine shops and big box home stores. I have checked with a couple of local RV super stores with no luck. Your help would be appreciated! Sonny B.

Sonny, if the NPT size of the threads is 3/4-inch, you can use a standard, tapered pipe thread to clean out the female threads. Just don’t cut too deeply; only enough to restore the threads in the tank. The tank threads will be a whole lot softer, so go slow! Here’s a link to a pipe tap that should work, though I'm sure any brand will do the trick.

Monday, June 1, 2015

RV Water Heater & Refrigerator Pilot Problems


Dear RV Doctor, I am having a problem with the pilot light on the hot water tank on my old motorhome. I can light the pilot light, but when I turn the dial to the ON position, it takes a moment for the ignition, and when the propane gas finally reaches the pilot light area, the combustion is so strong that it blows out the pilot light and the main heating flame too. This unit also has a refrigerator that I can run on AC, DC, or propane. On this unit, with propane selected, after you light the pilot light, it runs and cools the fridge automatically depending on the temperature level that I set it to. I can light that pilot flame, but after that, nothing happens. The pilot light just stays on and doesn't ignite a flame to cool the refrigerator. I believe that both of these problems are related, but I am not sure as to what the fix is. The hot water tank is near the front of the unit, where as the Norcold refrigerator is at the rear on the same side as the hot water tank. I appreciate any advice that you can offer in solving my problem. Dan R. (Howell, MI)


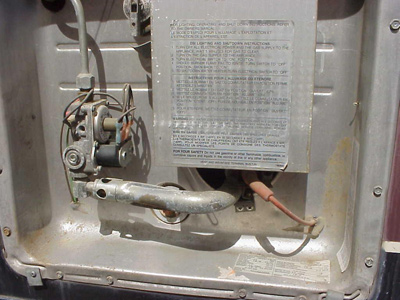
Dan, a couple things to consider; first on the water heater. There will always be a brief delay from the time you move the control valve from "Pilot" to "On" before the main flame ignites. The propane has to travel from the control valve, through the orifice and down the mixing tube, mix with some fresh air, before reaching the pilot flame. The alignment of this mixing tube is crucial. As the gas flows through the tube it draws in air to mix with the propane prior to it igniting. If the tube is not centered on the orifice fitting at the control valve and in line with the angle of that fitting, then turbulence will take place inside the tube and create an improper mixture for combustion. This can cause pilot and main flame outage. Plus the pilot flame should only encompass the very tip of the thermocouple. A too large or too small pilot flame can also lead to pilot outage. 

On the pilot model refrigerator, the standing pilot flame will stay small until the temperature inside the refrigerator rises above the setting of the thermostat. If the box is already cooled it’s not likely to ignite the main burner until you open the door a couple of times or put warm food inside. Now if the box is already warm and the main flame will not come on, chances are the thermostat capillary tube is mis-positioned or the thermostat has lost it’s charge necessitating a new thermostat. A few tests by a competent Certified service technician will quickly reveal the exact cause. But most importantly, for both the water heater and the refrigerator, (as well as the other two propane appliances), is the delivery line pressure of the propane. It must be set to 11.0 inches of water column. Being an older coach, it’s probably wise to have a service tech perform a timed pressure drop leak test as well as set the pressure regulator to the correct setting just to be safe. It takes special equipment to measure, set the pressure and to test the regulator, so unfortunately, this is one task best left to the professionals. 

##RVT930

Wednesday, November 12, 2014

Swap RV Water Heator for Electric-Only


I will have to change my water heater on my RV because it is leaking. My question is: Can I replace it with an electric water heater only. I am not doing dry camping anymore so I was wondering if it was alright to have only an electric heater tank instead. Awaiting your reply and I thank you. Reinelde L.

 Reindelde, are you 100% sure your current water heater does not have an AC electrical heating element in it already? Many RV water heaters are equipped with an electric option along with the propane burner. I could tell from the model number or a photo of the data plate. If yours does, it may be less expensive to simply replace the inner tank that is leaking. If yours does not, the only drawback to installing an electric only heater, besides the labor costs, is when considering resale or trade-in value. Most RVers would certainly want an RV water heater so unless you plan on keeping that RV forever, I’d stick with an RV heater with an electric element.

But can you install an electric water heater? Sure, as long as the wiring and heater are installed properly by a certified RV technician. There are codes and standards that must be maintained for both the fresh water plumbing and the electrical circuit concerning those modifications. But if an aftermarket electric water heater fits in the same space, go for it!

Wednesday, July 16, 2014

Broken Anode - Revisited w/Comment


I don’t have a question, but rather a comment on an earlier response to a question regarding leaving a broken anode in a water heater. The anode in the water heater in an old coach of mine disintegrated and left a pile of a coarse "sand" in the tank that got sucked into the system. It got into the toilet flush line and plugged the filter very frequently and was a raging pain in the neck. And it was very difficult to clean out. A long and tedious job. I don't think I'd want that portion of anode in my tank after that awful experience. Larry B. (Silver City, NM)

I agree Larry; it would be far better to remove that remnant of the anode, but unfortunately, there's really no easy way (if any), to accomplish that task. If I had to answer that question again, I would further recommend that the owner flush out the water heater every month as a precaution. I did allude to that in my earlier response. That, and possibly add a KDF-type filtration system to remove the finer particles that may exit the heater. I am perplexed, however, at how something isolated solely to the hot side of the fresh water system migrated to the toilet. If anything, you'd expect that "sand" to be expelled out through a hot faucet. Or simply lie dormant on the bottom of the water heater tank until flushed out through the drain. But your advice is well-taken. Experience is often the best teacher!

Tuesday, May 20, 2014

Noisy Water Heater Redux

My wife and I enjoyed your classes at the RVSEF Conference in Bowling Green a few years ago. Now I have a question regarding the Atwood water heater in my 2013 Jayco Eagle Premier. The heater is model GC10A-4E. When running on propane with the outside access door open the heater appears to operate normally and burns quietly with a light blue flame. When I close the access door, the heater seems to adopt a dual personality. Part of the time it is quiet just as with the door open. But part of the time it burns with a roar, kind of reminding me of a mini jet plane. It switches back and forth between quiet and loud several times a minute. I can interrupt the loud periods by opening the access door. I have disassembled the burner and checked for blockages, but everything is open and clean.

I have found two ways to make it noisy more frequently, but none to eliminate the noise entirely. I set the air to fuel ratio per Atwood's instructions, closing the air shutter until the flame begins to show areas of yellow, and then opening it slightly until the flame is all blue. I can make it noisy more frequently by increasing the air to fuel ratio via opening the slots in the air shutter. The second way to make it noisy is to cover the ventilation cutout on the access door with window screen to keep out insects. If I put standard aluminum window screen over the cutout it roars about 90% of the time. This suggests to me that it needs a larger cutout, but if that were the case then all owners of this model would have a noise problem. How do you suggest I troubleshoot this problem? Jack S.


Jack, you’ve already solved one part of the problem with a noisy water heater; that of the proper air/fuel mixture adjustment. The other tricky factor is the alignment of all the pieces from the main burner orifice, through the mixing tube and to the ignition probes at the flame spreader at the mouth of the burner. The mixing tube must be properly in line with the face of the orifice fitting; a straight line that is determined by the angle of the gas control valve and the brass orifice fitting attached to it. Likewise, the orifice opening must be “centered” in the open end of the mixing tube. Picture a clock face. The orifice itself must be positioned at the very center of the clock where the hour and minute hands attach. If it’s off-centered or if the mixing tube is not aligned with the angle of the orifice fitting, as gas enters and draws in fresh air, the combination of the mixture results in an uneven mixture of gas and air and a turbulence is created instead of an even, steady flow of mixed air and fuel. This fluctuating turbulence is the source of the soft/loud combustion taking place. Check out this video.

I believe once you check these additional items and reposition the primary air opening for optimum performance you’ll be able to eliminate the problem. Here’s a short video explanation regarding the adjustment of the air shutter. 


##RVT861


Wednesday, April 9, 2014

Old Water Heater Burner Needed

Hey Doc! I'm asking if you could help me find a water heater burner assembly for a 1977 Comfort. I don't want to get a new heater if this part can be replaced. It is an old camper and I have redone the whole inside floor, ceiling etc. The heater is a American Appliance 6-gallon water heater, model #6ARV. I hope you can help me or at least steer me in the right direction! Thanks! Chris (no city/state)

Chris, American Appliance was purchased by Suburban Manufacturing some years ago. It’s doubtful they’ll still have parts for the old line, however. Your best bet, short of replacing the entire water heater would be to locate an aftermarket repair facility that specializes in RV appliances. Many of these specialty shops have older components for obsolete units still in the field. One such shop I relied on many years ago was Howell’s RV Appliance Repair. I've known Leonard for forty-plus years and if anyone would have old obsolete components, it would be him. You didn't tell me where you're located, but Leonard still runs a mobile business in the greater San Diego area. Give him a call at 619-449-6231. You could also contact local RV dealers and repair shops in your area as well, but I'd put my wager on Howell's first.


Friday, November 8, 2013

Winterizing Woes


Winterizing my motorhome is a joke. There are no bypasses and to reach the pump you have to crawl over the bed to access it. There’s hardly room to add a winterizing kit and there’s no valves to bypass the hot water tank. Accessing the back of the water heater, you have to get on your knees go under a closet just to see anything! I sent an email to the manufacturer to redesign this and to give them a general slap on the hand for having a terrible product mechanical-wise. Us older adults should not have to crawl on our knees to get at things. I also don't want to buy ten gallons of RV antifreeze. Do you have suggestions on a quick fix? I asked the manufacturer to go out on the plant floor and look over a model and tell me what one of them would do. They sent me a schematic, which is great, but what to do? Joe Z. (Buffalo, NY)

Joe, regarding the difficulty in accessing certain components in your motorhome, you appear to be not a bit reticent. I have a seminar about “technically choosing” an RV and one of the precepts is, how easy is it to gain access to certain components. We look at floor plans, color schemes, amenities, etc., but some manufacturers rarely consider the owner’s access concerns. Not all, mind you, but some. 

Most water heaters will indeed be installed on the floor of the coach, so chances are, it will still take getting on your knees to switch the by-pass valves. Aftermarket by-pass kits are readily available for water heaters and I recommend the type that utilizes brass valves rather than plastic. To me, they hold up better in the long run. A certified RV tech should also be able to modify the fresh water line between the tank and the pump and make it easier to pump in the anti-freeze. But keep in mind, you can simply pour a couple gallons of RV anti-freeze directly into the fresh water tank and accomplish the same thing. An astute RV tech can also retrofit the plumbing by-pass equipment using electrically-operated solenoid valves, but this might prove a bit costly. But it is an option. I do encourage you to keep suggesting to manufacturers how to improve their products. Though they often may not have the answers you’re looking for at that given moment, they will, at least, listen to what you have to say. 

##RVT870

Thursday, October 31, 2013

Water Heater - Electric or Propane?


I have a Jayco trailer that has a dual electric/propane water heater. The propane heats the water faster, but the electric is at no cost to us when using the power that our State Park provides. We don’t need hot water right away, so we have been using the electric mode for the first year we have used the unit. Is one method better for the long-term life of the water heater? And why? Thanks! Larry G., (Mesquite, TX)

Well Larry, as you use the electric heating element, over time, it may fatigue slightly just from constant use. And as you operate the propane function to heat the water, those components will require some maintenance over the course of time. As to which is better for the heater itself? It probably makes no difference. In fact, it is entirely plausible to operate both the electric element AND the propane burner at the same time for a faster heating cycle and a quicker recovery rate. But the prudent thing to do is to take advantage of the free electricity and conserve the propane for the other appliances. Other than keeping the connection clean, dry and tight, there is no maintenance to be concerned about using the electric element, but the propane components will need some cleaning annually. I say keep using the electric and save on propane costs! In fact, there is a new aftermarket kit available now that will convert your forced air furnace to operate on electric heat. Produced by RV Comfort Systems, the Cheap Heat electric add-on kit enables the user to use electricity instead of propane to heat the entire RV, and then to switch back to propane when necessary. Check it out here. 

##RVT760 


Friday, August 23, 2013

Water Water Everywhere!


When I run the water pump on my newish coach, water runs out of the area where my water heater is. After inspection, the water is running out of the check valve in my water heater. I spoke to a friend and he advised me that I just needed to replace the P&T valve in my water heater. I have only owned this unit for about six months and never had this problem when I first purchased it. So, is it as simple as just replacing the P&T valve or check valve in my water heater? What would have caused this valve to go out? I have noticed whenever the water pump is on, water just streams from my water heater. I am not very mechanical but I’m tired of my wife yelling at me because she does not have any water! Kevin C., (Glendale, AZ)

Kevin, in a single sentence, you mentioned a check valve and the pressure and temperature (P&T) relief valve on the water heater. You realize these are two different components, right? Where you see the water streaming from the heater is going to reveal the biggest clue! The P&T valve is located on the exterior of the water heater, behind the access door. If water is profusely emanating from the P&T valve, it may need replacing. If it just drips a small amount but at a constant rate, try opening, then snapping shut the lever on the P&T valve a couple of times. Oftentimes, tank residue or mineral deposits can prevent the valve from fully seating. Take care to only do this only when the water in the tank has cooled! The system can be pressurized by the water pump, but be advised, you still may get a little damp! It IS a normal occurrence, however, for the P&T valve to seep a little during the actual heating cycle, but certainly not enough to keep the water pump running. Also, while you’re out there on the outside of the water heater, be sure the drain plug is not leaking. 

The check valve(s), (you may have two), however, are located on the back of the water heater, accessed from inside the coach. It’s possible a fitting or one of the check valves may have ruptured, cracked or otherwise been rendered faulty. Some of the cheaper, plastic check valves fail at a higher rate than the brass valves. But it’s impossible to know until you gain access to the rear of the water heater from the inside. A close inspection of all the fittings and connections will reveal the location of the culprit. Hopefully it’s just a leaky P&T valve, but don’t overlook the fact it could be leaking from any component at the back of the heater as well. 

A worst-case scenario would be a ruptured inner tank, but that is unlikely on a relatively newer rig. After replacing the offending component, be sure to have the fresh water distribution system leak tested and the air cushion re-established on top of the water in the heater. Let me know if you need directions how to perform that procedure.

##RVT849


Friday, February 15, 2013

Long Live the RV Water Heater

Hey Doc, what is the average life span of an RV water heater? Jim N., (no city/state)

Jim, that’s really hard to quantify. Under proper use and a proactive preventive maintenance regimen, there’s no reason an RV water heater cannot have an indefinite life. The corrosiveness and amount of mineral water it is exposed to obviously will have an influence, but if you flush it out properly once or twice a year, perform proper winterizing techniques, regular chlorinating procedures, and clean & service the gas components annually, the inner tank should last indefinitely.

If you have a Suburban water heater, keeping a close eye on the anode rod once a year or so will help extend your water heater's life as well. Long live all RV water heaters! Unless you decide to opt for a tankless water heater.


Thursday, January 10, 2013

Instantaneous Hot Water While Boon-Docking

We're RV wannabes and still learning so please pardon the ignorance of my question. I'm very interested in the tankless water heaters. Just makes more sense; less weight, greater fuel economy, etc. My question is, can you still boondock with a tankless water heater? Or are you limited to a direct water hookup? Virginia S., (Dix, IL) 

Indeed you can still boondock with either of the two available brands of tankless water heaters, Virginia. They are both powered by 12-volt DC battery voltage and burn propane, so as long as the battery bank is healthy and you have propane aboard, you can still have hot water flowing from the fresh water container via the on-board water pump. No need for cold showers. Ever!

Sunday, November 4, 2012

RV Water Heater By-Pass Valves....again.

The 10-gallon water heater in my Holiday Rambler is still producing hot water but there is nothing coming out of the faucets. It is as if there is no water pressure; there is no leak evident. When I turn the bypass valve to the "off" position, I noticed that water is still flowing into the water heater because I pulled the plastic drain plug and either way, the water was flowing into the heater and draining out the drain hole. If the valve is bad would this be the answer as to why there is no pressure coming out of the faucet? Kevin, (Virginia Beach, VA)

Kevin, it sure sounds like you indeed have a faulty valve or two in that bypass system. I’m going to guess they are plastic valves, which seemingly have issues with the constant exposure to the heated water. Somehow, either the plastic body or the valve portion warps over time and either gets stuck in the closed (or partially open) position. I’d toss those plastic valves and install a set of brass valves in their place. I’ll double my wager that all will be well after they are replaced.

There may also be a one-way check valve or backflow preventer positioned at the hot outlet of the water heater. A faulty check valve at the hot outlet could also reduce, minimize or prevent adequate pressure and flow from reaching the hot faucets. Some water heaters have a check valve located at the cold water inlet to the heater, but since you're able to fill the heater and see it draining, a check valve at this location is probably still viable. But like the bypass valves, if those check valves are made of plastic, I'd replace them with brass valves.

##RVT84;##RVT934

Thursday, June 14, 2012

Hot Water From a Cold Faucet in a Fifth Wheel RV

I have a 2000 Nomad, 27-foot 5th wheel trailer. The water heater is located below the sink. When I operate the water heater, hot water backs up into the cold water piping. When I operate the kitchen sink's cold water faucet, hot water is delivered. The only way I can think to solve this problem is to install a check valve at the cold water input pipe to the water heater. Do you have any other suggestions? Ron L., (Elk Grove, CA)

Ron, this is a relatively common problem with some of the older floor plans when the manufacturer tee’d off the cold input right at the water heater in order to feed another receptacle. You’re right on the money with the solution! Adding a check valve leading directly into the cold inlet at the rear of the water heater will indeed negate the migration of heated water out of the heater through the cold inlet. This process is exacerbated by a siphoning effect when you open the cold faucet to the sink.

I do recommend a brass check valve, however. Stay away from the lesser-expensive plastic check valves. They have a history of distorting and for chronic failure when positioned near a heat source, (the hot water in the heater). Some plastic check valves, (or any type of valve for that matter), can fail and remain permanently open OR permanently closed due to the deterioration of the internal seals. Your best bet is with a brass check valve.

Hmm...ever thought about becoming an RV service technician? It seems you have a good foundation of correct troubleshooting skills! Congrats!  


##RVT838 

Wednesday, February 22, 2012

RV Water Heater Blues


I was winterizing our ten-year-old coach and flushing out the water heater. Some scale, I know, is usual, but what came out were lots of blue flakes. I am assuming that this is the glass lining of the tank and that the heater is basically totaled and not usable. I'd be very pleased if you could confirm that for me. George N., (no city/state)

George, unfortunately, it is relatively easy to inadvertently scrape the inside of the tank if you insert a long wand or tube inside the drain plug as you flush out the inner tank. One way to determine if the flakes are actually pieces of glass or the chemical result of something else, is to put a few of them in a cup of vinegar and see if they dissolve. If they do, then it's probably some type of mineral deposit that reacted with the composition of the water in the tank. If they do not, they could be little pieces of the glass lining though I'm not 100% certain they would be blue in color. Assuming they are indeed glass slivers from the tank lining, the obvious safe action would be to replace the complete water heater (or at least the inner tank), and not take any chances of having them migrate further into the hot side of the fresh water system. But try the dissolving test first and let me know what you find out. It could simply be some type of mineral reaction between the anode and the water PH and the heat associated with the heater. But finding out what those flakes really are, is the key!

By the way, the photo above is what your Suburban inner tank might look like before it is glass-lined. 

##RVT827

Thursday, January 26, 2012

Stripped Threads on RV Water Heater Anode

This pertains to a  Suburban water heater, specifically the anode rod threading. I cannot get the new anode rod threading to "catch" and screw in straight. It's been getting more difficult every year but this year I'm stymied. Any help? David B., (St. George, UT) 

David, as will happen every now and again with repeated procedures, the female threads on the water heater tank fitting have likely become damaged or corroded over time. In the shop we use a tool called a “thread chaser.” Tool makers manufacturer both male and female thread chasers. Similar to a tap or a die, (but different), thread chasers are designed specifically to clean and straighten existing threads only. To use a standard tap may actually remove portions of the existing threads as well as cut new threads; something to be avoided in a water heater tank fitting. You’ll need a 3/4-inch NPT thread chaser since the replacement anode will likely have a tapered pipe thread. As a last resort, using a 3/4-inch NPT standard tap will work if you’re very careful. But the pros will use a correctly sized thread chaser.

Also, be sure to flush out the heater tank after chasing the threads in case any fragments of corrosion, metal or debris fell into the tank during your repair process. A couple wraps of thread sealing tape or an appropriate fresh water pipe joint compound on the first two or three threads of the new anode should have you back in business in no time.


##RVT807;##RVT905

Tuesday, December 13, 2011

Sealing RV Clearance Lamps

I bought a 27-foot Minnie Winnie back in 1992 and have maintained it quite well. I have been able to repair all of the run/clearance light issues and I'm now ready to re-caulk them to keep the water out. I have your book and have cruised your website and the Internet but have not found specific instructions. Should I caulk all around the fixture base and then add some caulk all around the lens before putting it back on the base fixture? I recently had to take a hammer to one of my lenses that I had caulked a few years ago to get it off and it wasn't easy to find an exact replacement lens. Also, want to thank you for your You Tube video on adjusting the RV water heater flame. It helped me understand how my water heater really worked. Before I saw your video, I had replaced the electrode assembly because I thought the main burner wasn't lighting, but it was. So I cleaned the air adjustment tube, put on a new electrode assembly and still no hot water. It was driving me crazy so I reviewed more of your info and finally figured out the problem - it was one of my water heater bypass valves in the wrong position! Thanks for all the help! Cathe R., (West Springfield, MA)

Cathe, as far as clearance markers and trim lamps, always seal behind the fixture itself; between the fixture base and the side or cap on the RV. Butyl caulk is commonly used for this, but I recommend Eternabond double-stick tape. It simply is not prone to drying out and cracking over time like some butyl caulks or putty tapes. Do NOT seal the lens itself to the fixture. Many clearance lamp lenses are simply snapped into place (others are secured with screws), and all must have some method of disassembly in the likely event a bulb will eventually burn out and require replacing. Your “hammer” reference withstanding! You may even want to upgrade and switch to LED lamps.  

Great follow-through on the water heater issue! I’m happy to hear the information was helpful.

Wednesday, September 7, 2011

Replace Anode with Drain Valve?

I was told that it is best to drain your hot water tank after each excursion, therefore I replaced the anode with a petcock. I now drain the water out but am curious as to the soundness of this plumbing exchange. Any advice would be appreciated. Gary G., (Monessen, PA)

As far as draining after each trip, Gary, a lot depends on how often your excursions actually take place. Personally, I would only drain the water heater in preparation for winter storage, a lengthy period of non-use, when servicing the water heater or when chlorinating the fresh water system. Or perhaps when you encounter some foul water during a trip. But, remember the anode in the water heater is a necessity when the heater is in use, but only for Suburban and the older, American Appliance brands of water heaters. Water passing through the tank creates an electrolysis that will literally attack the tank from the inside. The anode is the sacrificial component that prevents the tank itself from becoming damaged. If you still want to drain the tank, simply remove the anode/drain plug. 

On the older American Appliance heaters, the anode had a separate connection on the rear of the heater, plus they were originally equipped with a drain cock anyway. I realize it is probably easier to drain with the valve, but it's more important to have that anode in the tank. In the long term, it will be worth the extra time it may take to drain the heater between trips. 

As a side note, I’ve seen some mis-information posted on  online blogs recently and wish to clarify when to replace the anode. Suburban recommends replacing the anode annually or when the rod has about 25% of its original size left. Heavy travelers may need to replace the anode more than once per year, but typically, once per camping season usually suffices. If you are a full-timer or travel often, check the anode at six-month intervals and replace it when it’s 75% deteriorated.

##RVT804; ##RVT885

Tuesday, July 26, 2011

Choosing a Tankless RV Water Heater

I am trying to compare tankless RV hot water heaters. The two I found are the Girard and Precision Temp. The Girard has less BTUs and states that to increase heat you need to decrease volume, which sucks for taking a shower. Is the Precision Temp unit the same? I am a full-timer and travel to and stay at winter locations. Phil W. (Rapid City, SD)

Phil, I’ve seen the Girard unit at the National RVIA Trade Show, but I’ve never installed one or had it tested. I haven't seen any reviews about it either. It’s relatively new on the market. The Precision Temp RV 500, on the other hand, has been around for a few years and I’ve personally installed and tested one. Though I didn't take a shower, (it was a customer's rig, after all!), it worked perfectly during testing after the installation. Click here to read my full review of the RV 500. 

Monday, June 13, 2011

Tankless RV Water Heater - Redux

I saw your comments about the tankless water heater. Five years ago I seriously considered getting one. I was going to replace my 10-gallon with a 5-gallon. I was floored when I saw the price of the unit. It was almost 3 times the price of the gas-electric-engine assist water heater I ended up getting. I figured I could buy a hell of a lot of propane with the price difference. You should have mentioned that fact to your readers. Most of the time I use the 110 volt feature and while traveling the engine gives what I need. When I boondock I just turn on the gas switch before I take a shower. Wilson S. (no city/state)

And a related question: 

I enjoyed your article on the tankless water system but it would be nice to know how much they cost and the approximate installation expense. Bob W. (Jacksonville, FL)


Wilson and Bob, as a general policy, I do not mention prices of the products we test and review; here’s why. With Internet shopping, plus varying retail levels at RV dealerships, stand-alone service centers, big box stores and discount warehouses, it would be impossible to establish an accurate price across the board. Even using a supplier’s “suggested retail price” is rarely accurate since some dealers will opt to take less of a profit margin just to make a sale. If I quoted any retail cost, someone will likely find it cheaper somewhere else. It really serves no purpose since it’s up to the buying public to actually set the selling price at the retail level. Due diligence and keen buyer awareness go much further than any dollar amount mentioned in an article. At least every retail outlet is on equal footing at that point.

But I hear ya! You have to weigh the cost vs. practicality in many instances. Not to defend the price of a tankless water heater, but it’s not just the cost of propane that fits into the formula. Less weight prolongs the life of RV tires, suspension components, etc. No tank eliminates maintenance costs. How far, how often you travel factors in, as does convenience. Some families might run out of hot water frequently if traveling extensively or living full-time in an RV. Endless hot water on demand just might be worth the extra cost for a family. Retail purchases, therefore, can be a very subjective decision. One of the great things about the RV industry! At least now you know why I don’t list prices in my product reviews!
  

Bob, the RV-500 that I installed was not a typical RV installation, but when replacing a standard RV propane water heater with the RV-500, the installation should probably take a certified technician no more than about two hours to install at the most. It all depends on how much alteration of the cut-out opening is necessary (if any). If replacing an electronic water heater, the 12-volt wiring should already be present. The propane gas line will likely need to be rerouted slightly as well. But that too, is already in the general vicinity.

I would suggest you download the installation instructions and take them to your local RV service shop. They’ll be able to provide you with a more accurate estimate after they read through the instructions and inspect your coach.
 

Disclaimer:

In all instances, every effort is made to ensure the correctness of all content on the RV Doctor Website. It is imperative that if you choose to follow any instructions or procedures outlined on any page of this website, you must first satisfy yourself thoroughly that neither personal nor product safety will be compromised or jeopardized.

All rights reserved.

If you are in doubt or do not feel comfortable about a procedure, do not continue. Simply call your local RV service facility and make an appointment with them. The advice, recommendations and procedures offered by the RV Doctor are solely those of Gary. They do not necessarily reflect the opinions, procedures and recommendations of our sponsors or advertisers.